Upcycling Wooden Crates into Stylish Shelves: A Step-by-Step Guide
Why Upcycle Wooden Crates?
Upcycling wooden crates into shelves is an eco-friendly way to repurpose materials while creating functional and stylish home decor. These wooden boxes can often be found at local stores, farmers’ markets, or even in your own garage, making them an affordable and sustainable option for upgrading your living space.
Materials Needed
- Wooden crates (size and quantity depend on your design)
- Sandpaper (medium and fine grit)
- Wood stain or paint
- Clear sealant (optional)
- Paintbrush or roller
- Level
- Screwdriver and screws (for mounting)
- L-brackets or shelf brackets (for added support)
- Measuring tape
- Stud finder (if mounting on walls)
- Protective gloves and eyewear
Choosing Your Crates
When selecting wooden crates, look for ones in good condition without significant damage or rot. Consider their size and how many you’ll need based on your design. Popular crate sizes typically vary from small (12” x 12”) to larger (24” x 18”). Mixing different sizes can create an artistic display, so acquire various dimensions for more interesting shelves.
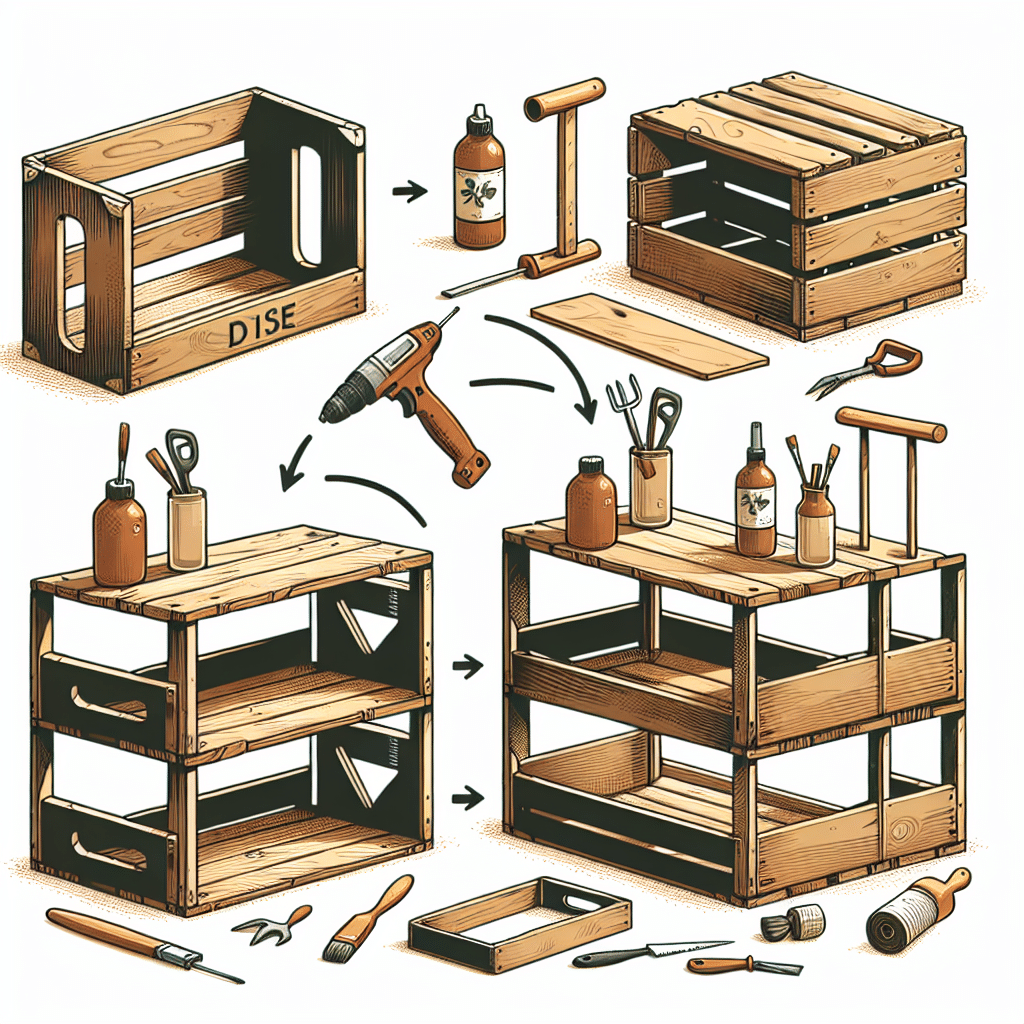
Preparing the Crates
-
Clean the Crates: Remove dust, dirt, and any old labels from the crates. A damp cloth can effectively clean them, but ensure they dry completely before proceeding to prevent mold or further damage.
-
Sand the Edges: Using medium-grit sandpaper, smooth rough edges and surfaces. This step is crucial for ensuring that your shelves are safe to handle and the finish adheres well.
-
Finish the Wood: Choose whether you’d like to stain or paint the crates. Staining preserves the wooden look while adding color, while paint allows for a more vibrant aesthetic. Apply your chosen finish with a paintbrush or roller, ensuring even coverage. Apply additional coats if necessary, allowing each coat to dry thoroughly.
-
Seal (Optional): For durability, especially if the shelves will hold heavier items or be located in high-traffic areas, consider applying a clear sealant once the stain or paint dries. This will protect against moisture and scratches.
Design Ideas for Crate Shelves
-
Single Crates as Wall Shelves: Mount single crates directly onto the wall for a minimalist look. These can be used for books, plants, or decorative items.
-
Stacked Crates: For an industrial vibe, stack crates either vertically or horizontally. Secure them together with screws if you are combining multiple crates, ensuring stability.
-
Floating Shelf Style: Create floating shelves by mounting crates with only the back secured to the wall. This design creates a visually intriguing effect, almost making the crates appear to hover.
-
Ladder Shelves: Position crates at incrementally staggered heights secured to a frame to imitate a ladder look. This maximizes vertical space and allows for creative lateral layouts.
Mounting Your Shelves
-
Determine Placement: Use a measuring tape to decide where you want the shelves. Consider the height of items you want to display or store, as well as the overall design of the room.
-
Locate Wall Studs: Use a stud finder to locate studs in the wall. Anchoring your shelves into studs ensures sturdiness and prevents potential accidents.
-
Level It Up: Mark your measurement points with a pencil and use a level to ensure the crates will be mounted evenly.
-
Attach the Crates: Secure L-brackets to the back of each crate and then attach them to the wall. For heavier items, make sure to use adequate screws that can sustain weight.
Accessorizing Your Crate Shelves
-
Personal Touches: Embellish the shelves with unique decor items such as books, potted plants, or cherished collectibles. Consider using different textures and colors to create visual intrigue.
-
Lighting Enhancements: Add LED strip lights beneath the shelves to create an inviting ambiance and highlight your decor.
-
Organizational Touches: Utilize bins or baskets within the crates to organize items, especially if the shelves are in a functional space like an office or a workshop.
Maintenance Tips
To keep your upcycled wooden shelves looking fresh:
- Dust regularly with a dry cloth.
- Avoid harsh chemicals; instead, use mild soap and water for stuck on stains.
- Check for any signs of wear, particularly if hanging, to ensure they remain securely attached.
Final Thoughts on Upcycling Wooden Crates
Upcycling wooden crates into shelves is a rewarding project that combines creativity, functionality, and sustainability. Whether you’re trying to save money, reduce waste, or simply looking for a DIY challenge, these shelves bring rustic charm and character to any room.